Pilomar overview
Preface
As a kid I was fascinated by the (then) large telescopes at observatories such as Mount Palomar, and now even they seem modest compared with the plans for the newer even larger telescopes appearing around the world. In 2012 when the Raspberry Pi was launched with its little V1 camera I wondered if it would be possible to do ANY useful astronomy with something so tiny. I followed some online instructions and built a little ‘Aurora Alarm’ for fun, then went no further until the Covid19 pandemic brought much of normal life to a standstill.
What to do with all this extra project time? I tinkered a little with stepper motors and working out how to drive them from Python on a Raspberry Pi Zero. The Raspberry Pi Foundation recently launched the Hi Quality Camera and a more powerful lens to go with it. What to do with a nice compact camera and my little routine for driving some stepper motors?
The main driver was to have fun learning … I just wanted to tinker and see where I ended up. The objective was to see how simple and small an astronomical device I could make on a slim budget. In practice there have been 12 iterations of Pi-lomar so far. V1 was a block of wood with a couple of tiny motors in it. Then it was adjusted with some simple improvements, tested, and improved again… Now a year later I am praying for some clear skies because I seem to have something roughly working! Though let’s call it a ‘proof of concept’ …. Tinkering never finishes.
But that tinkering has taught me some basic skills with Fusion360, 3D printing, Python, gears, bearings, and dusted off decades old lessons in trigonometry, astronomy and simple electronics.
Making stuff is great! Though I’m still terrible at all of the above…
During the pandemic in the UK, the phrase “Do it badly” has been popular. It doesn’t matter that it’s not perfect, just do SOMETHING! So this is what I’ve done so far; badly…
@Short_Bus_
24.Feb.2021
(Revised Mar.2021)
What is Pi-lomar?
It is a Linux controlled camera pretending to be a telescope. The camera sits on a couple of stepper motors that can move it to point in any direction I choose. Then it just takes photographs!
Let’s pick that apart…
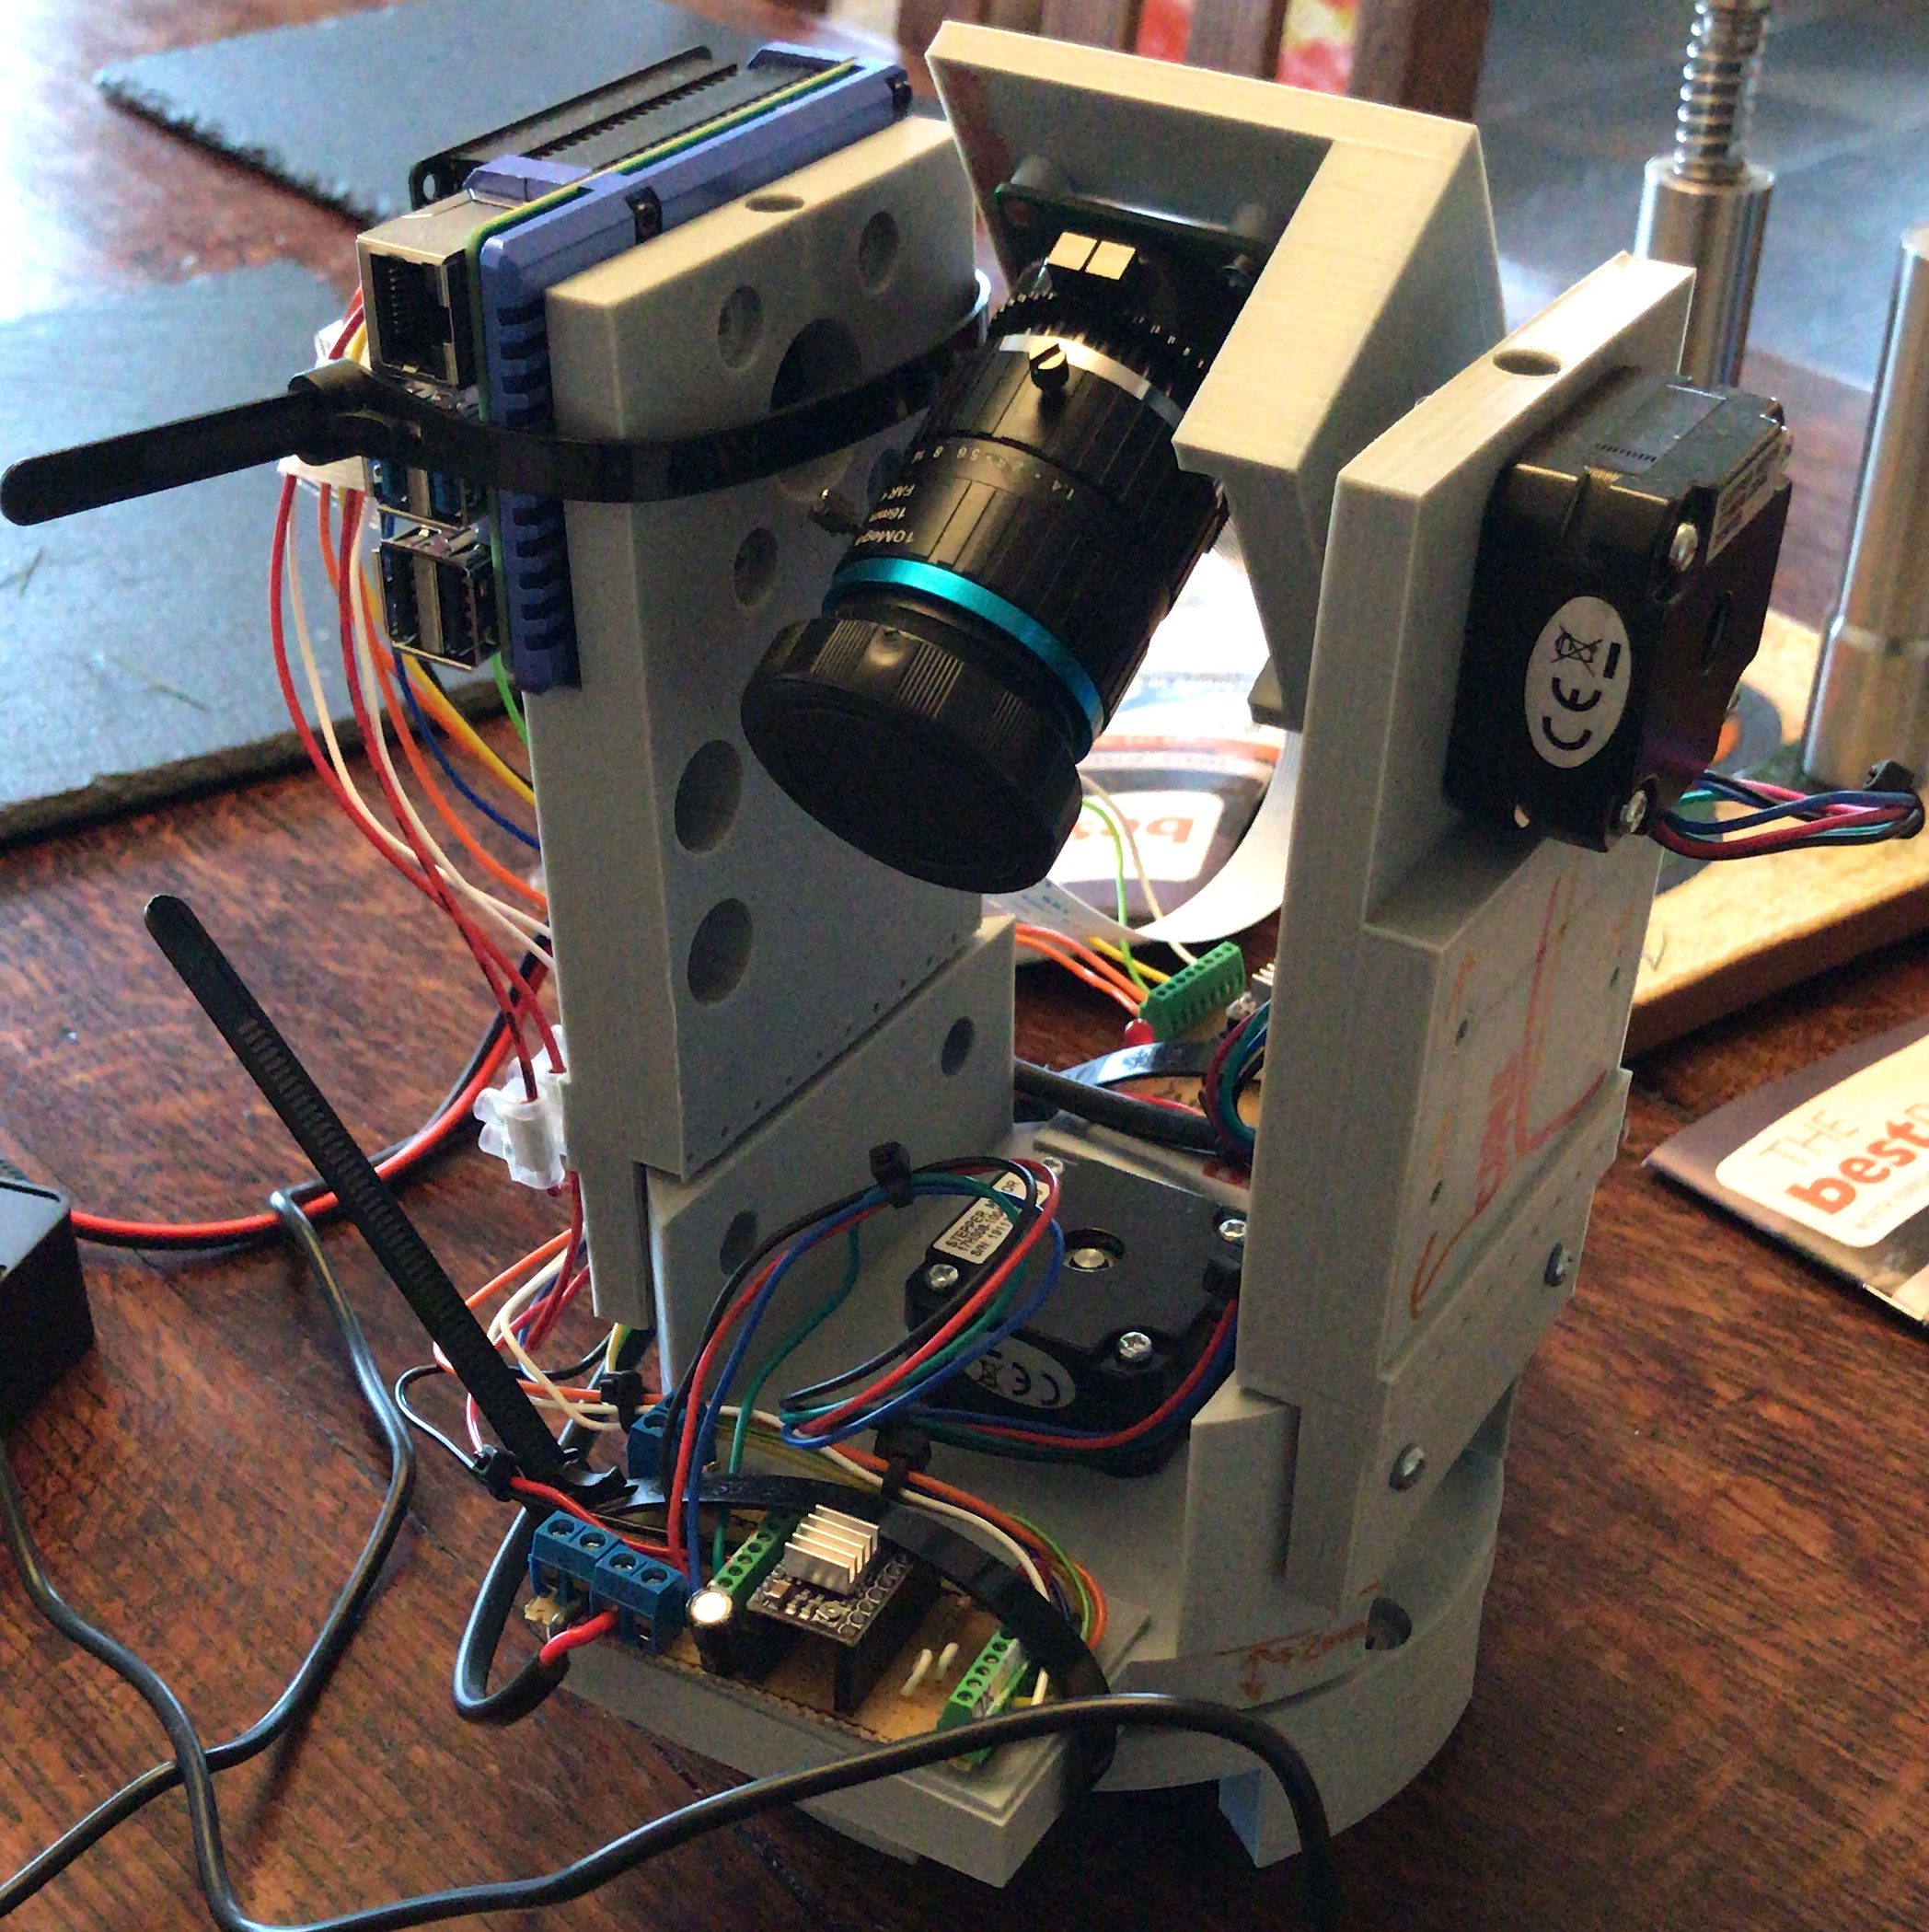
The Linux controller is a Raspberry Pi 4 with 2GB of memory. It’s running a home-grown Python 3 routine that coordinates the motor and camera activities.
The camera is the Raspberry Pi Hi Quality camera with the recommended 16mm telephoto lens attached.
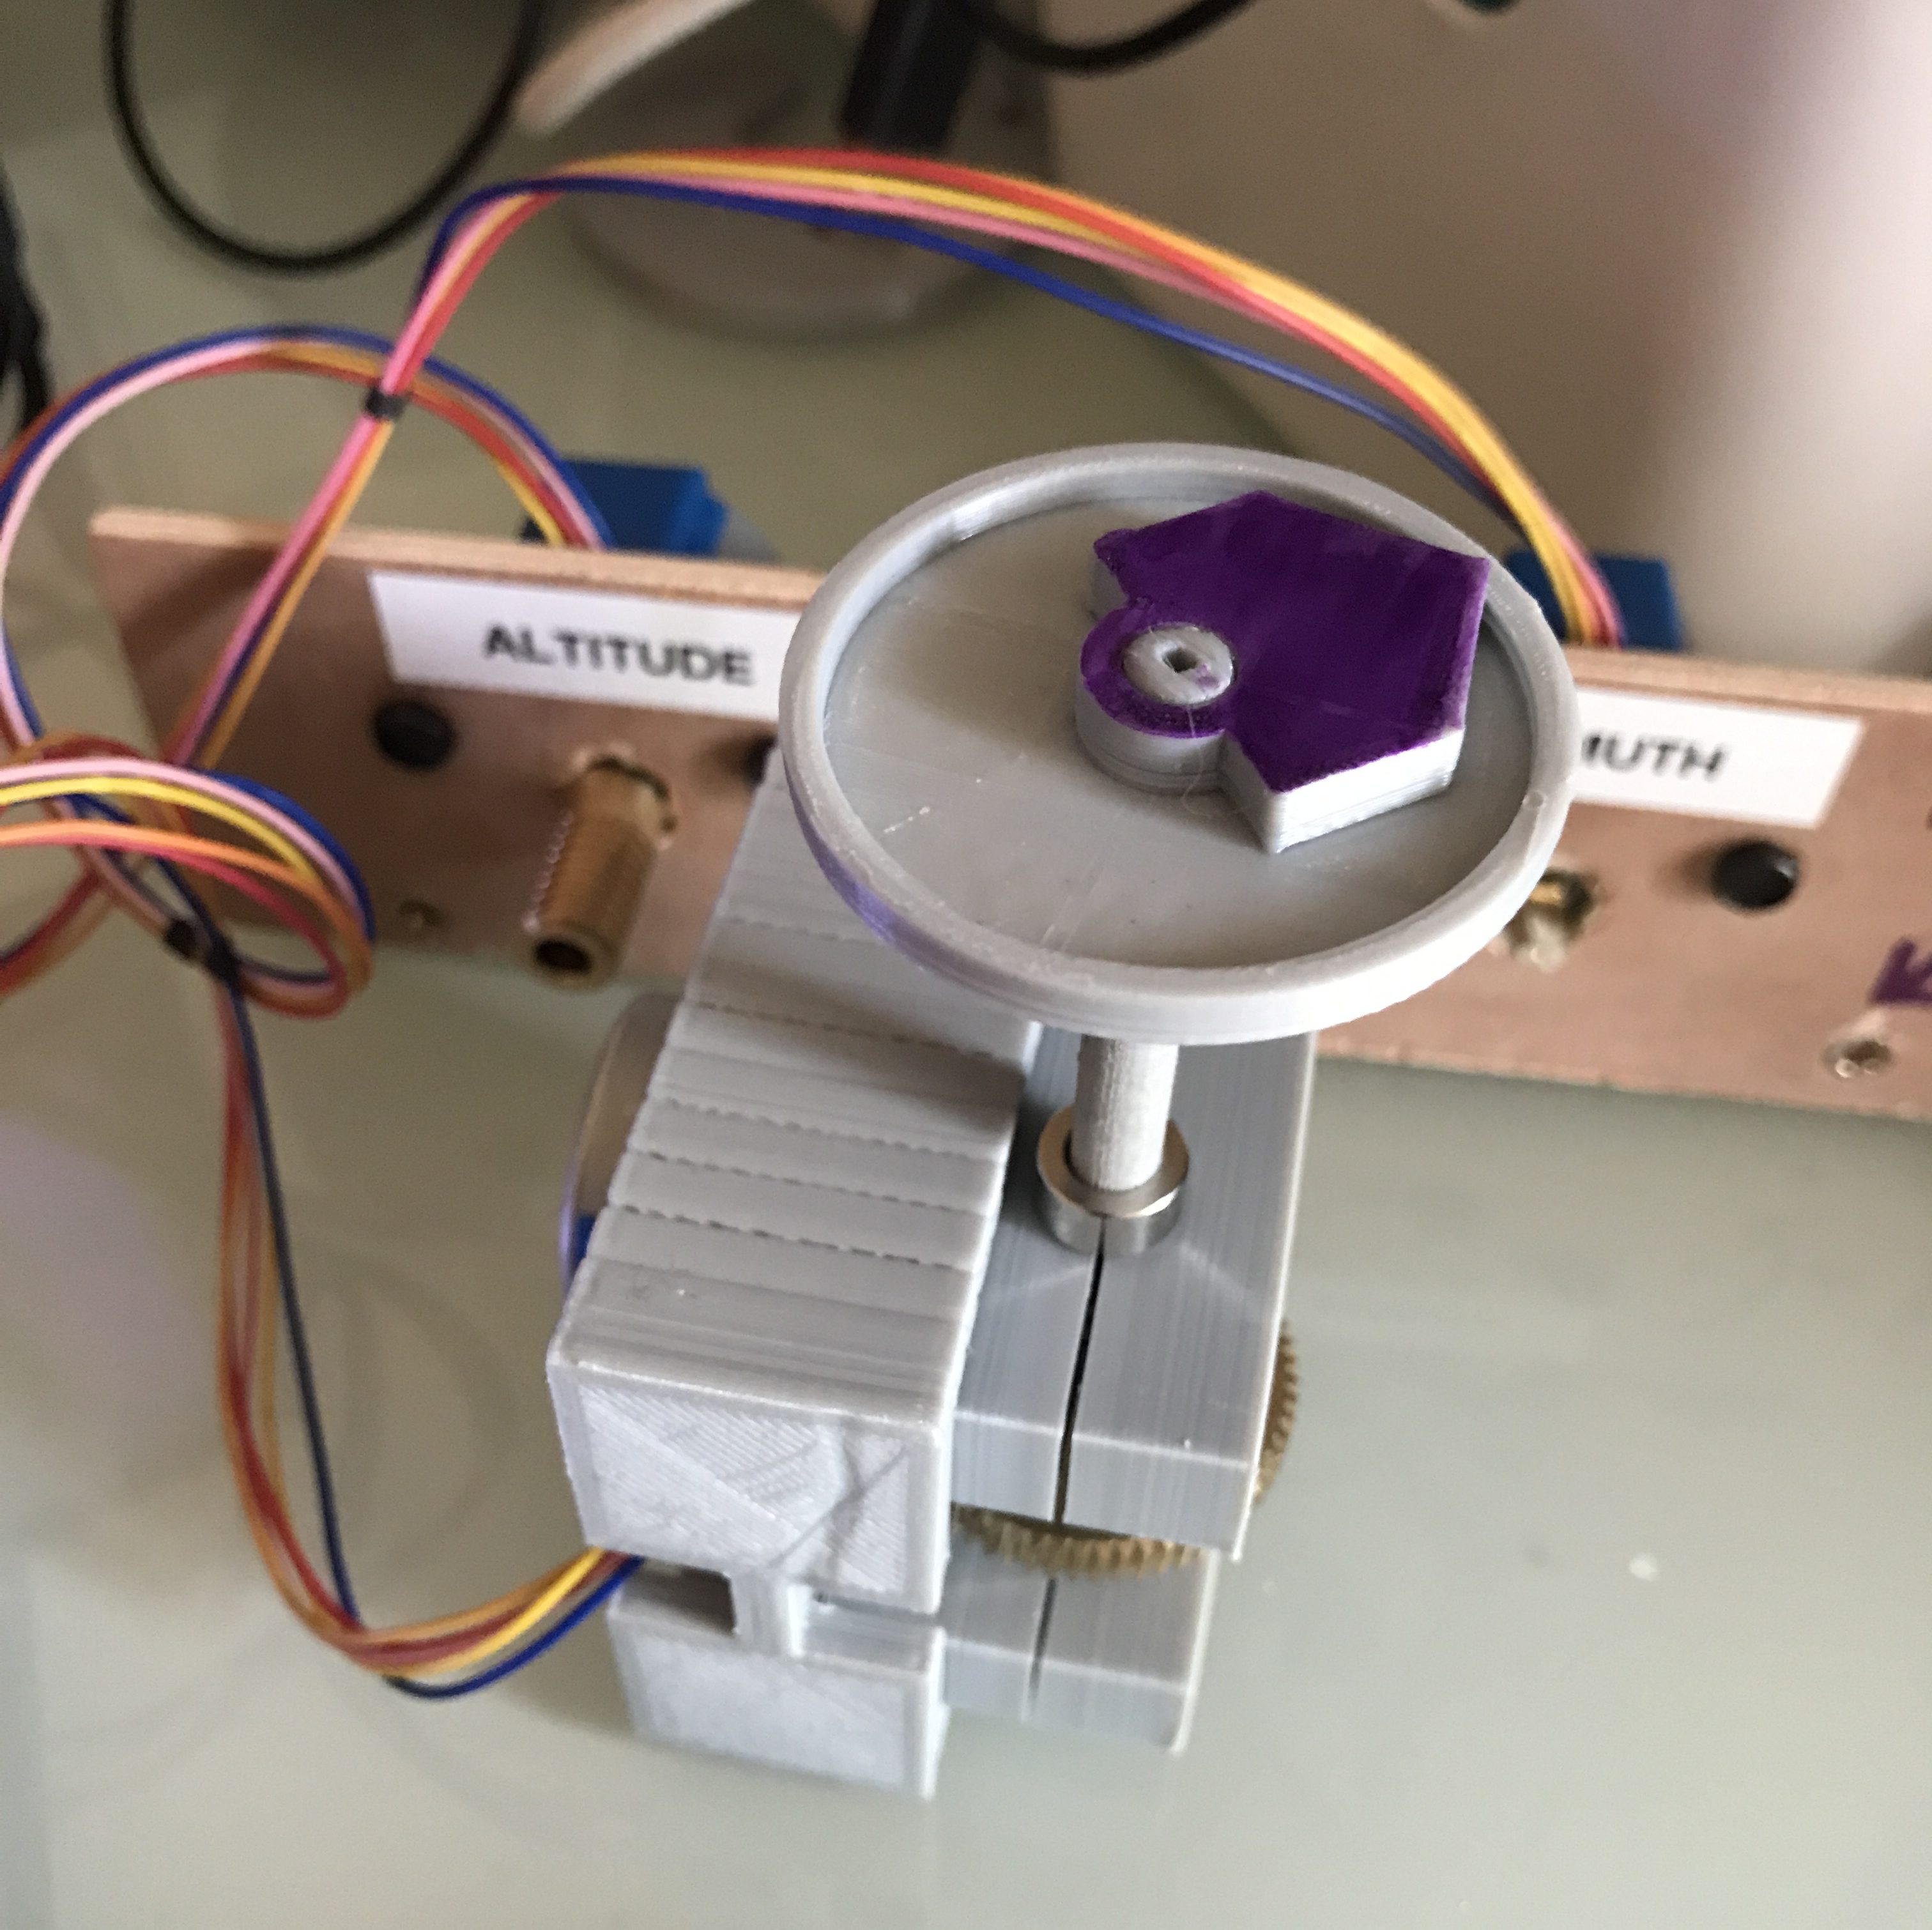
The stepper motors are 12V NEMA 17 0.9degree motors. They can move to 400 different positions in a circle. The motors are connected to a 1:60 ratio Worm Gear, giving 400*60 = 24000 positions that I can point each axis in. So the positioning can be given to 0.015 degree precision (in theory!) The motors are controlled from GPIO pins on the Raspberry Pi via a couple of DRV8825 stepper motor driver chips. The DRV8825 chip is a great way to convert the RPi GPIO signals into the 12V pulses that the motors need to move and hold their position.
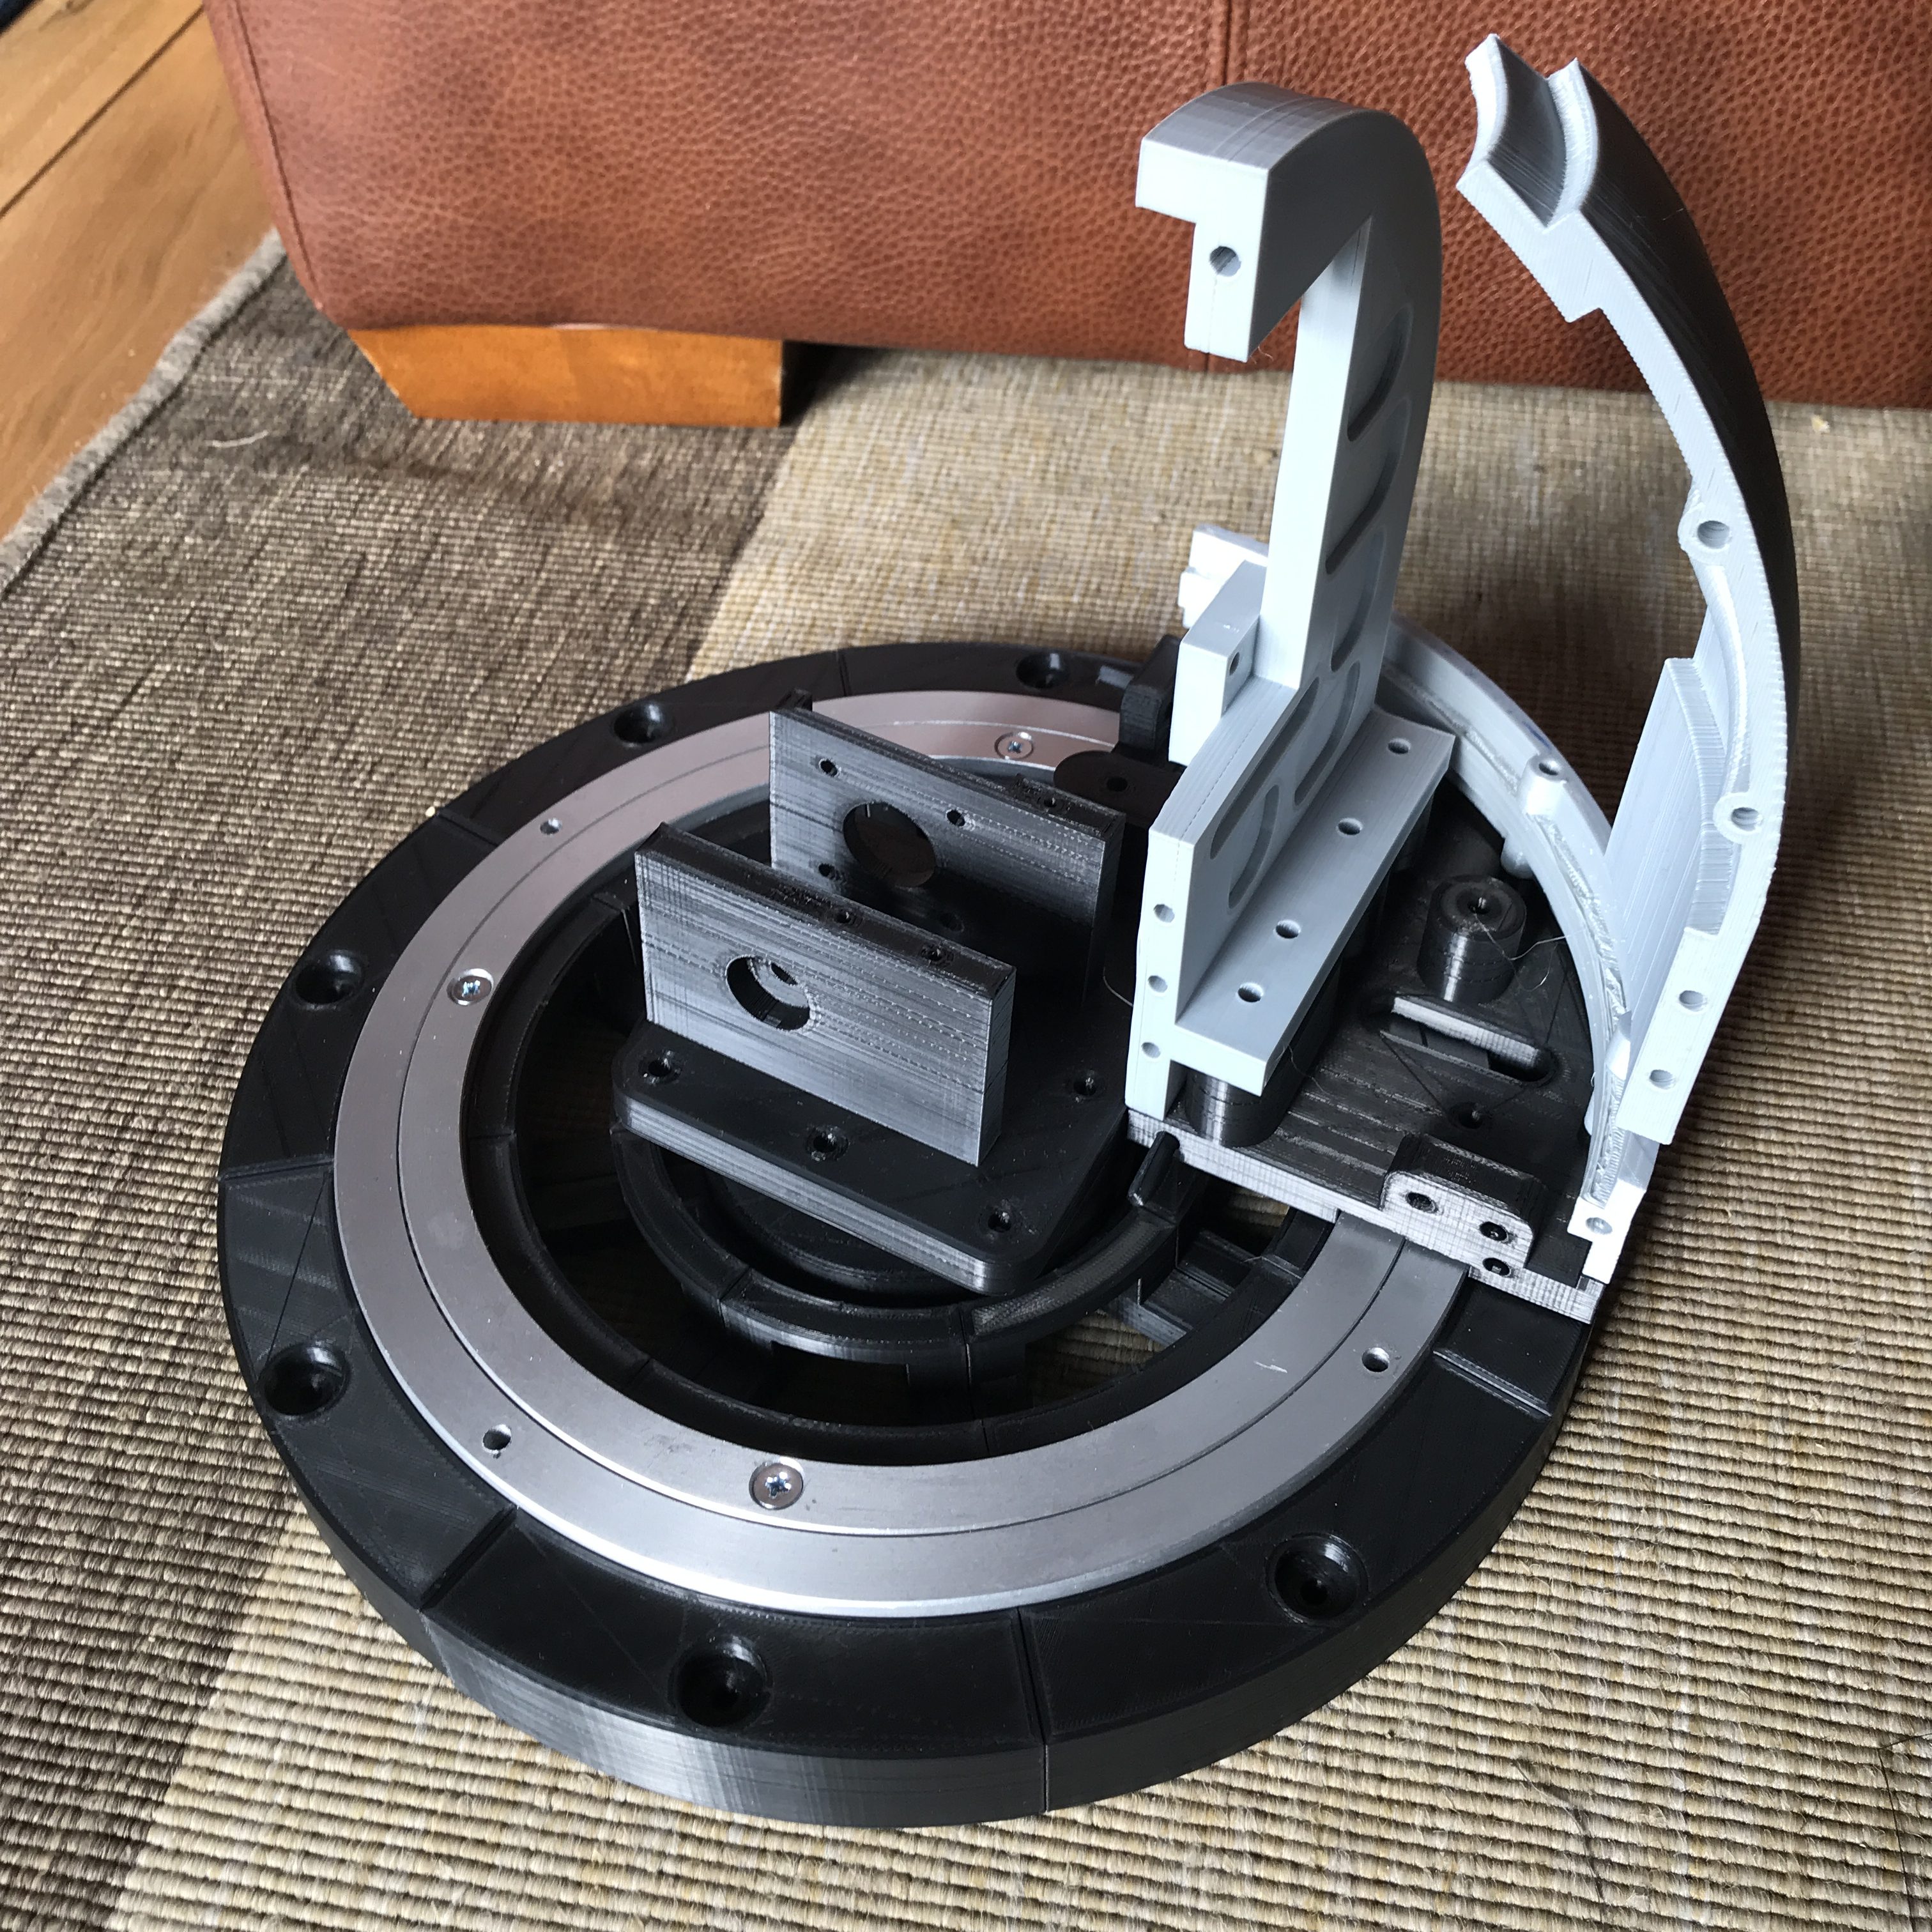
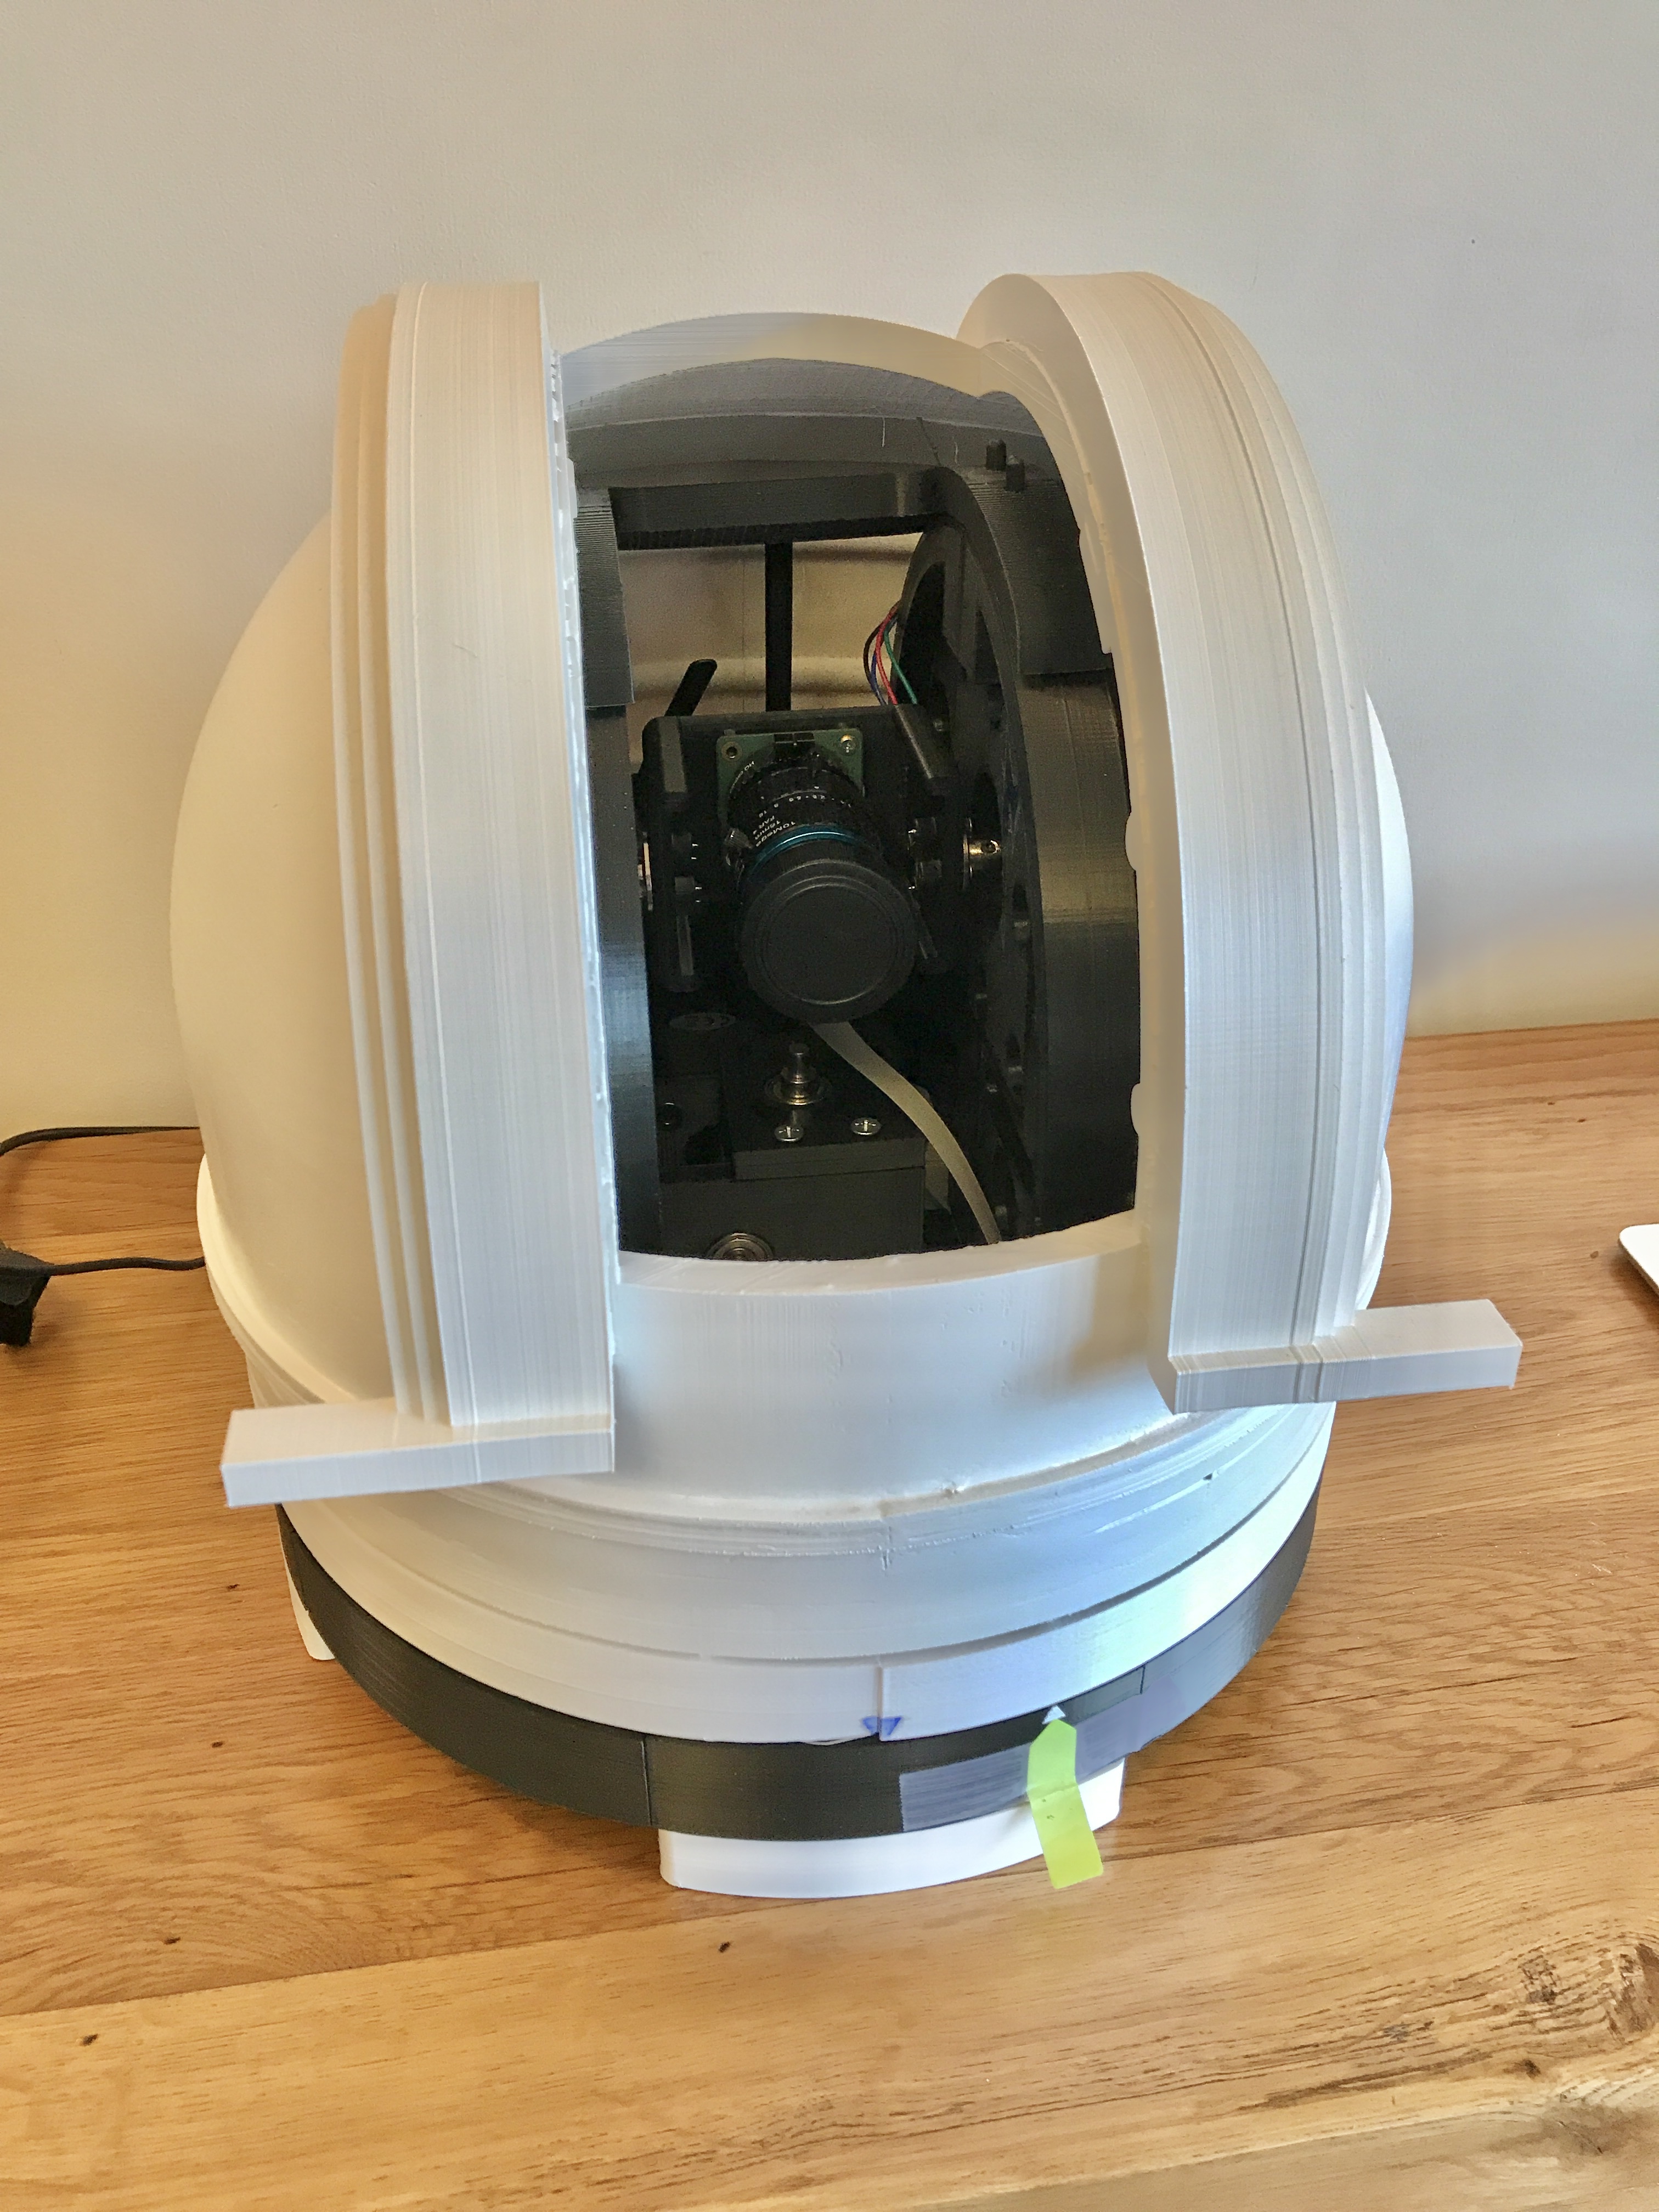
The whole thing sits in a technically unnecessary and probably too heavy 3D printed body that looks a little like the observatories that fascinated me as a kid, but I like it, so it’s staying J Can you guess which observatory inspired the look?
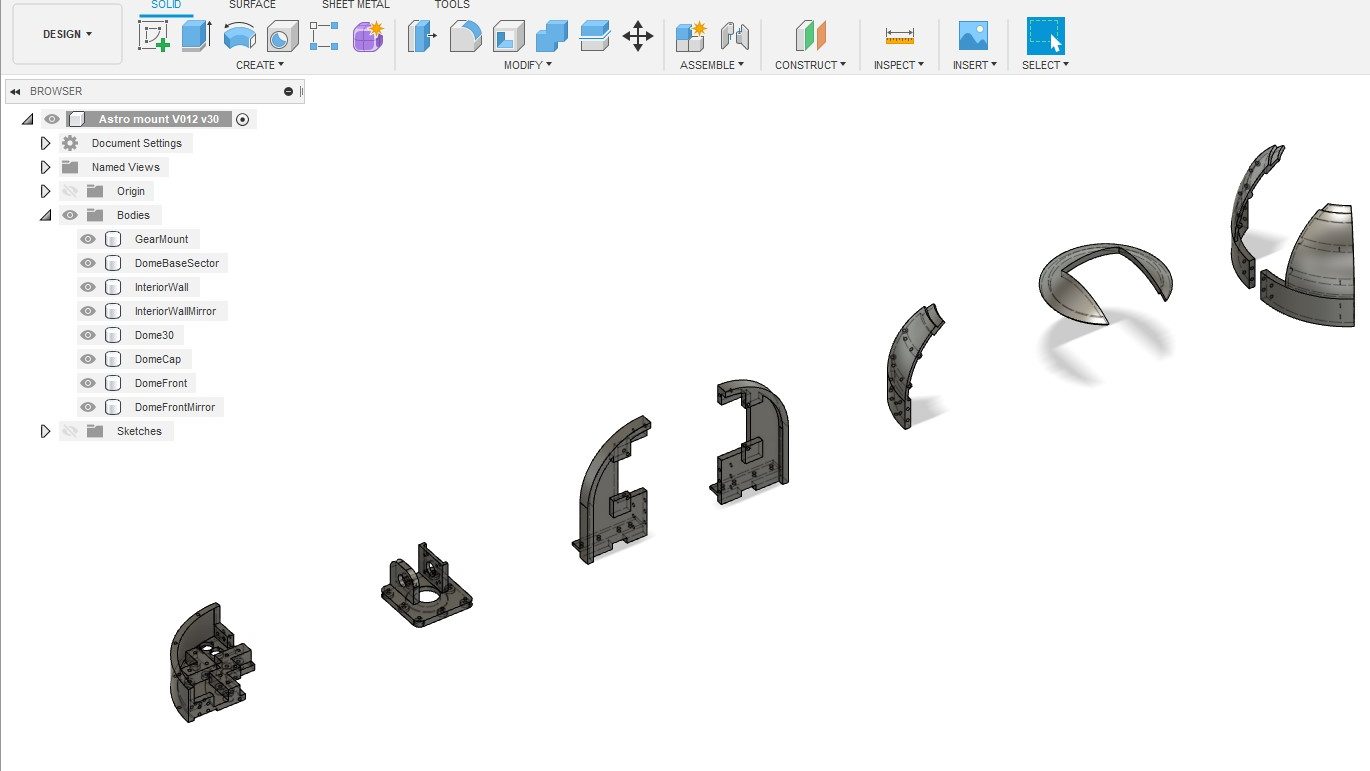
How is the body made?
The body is made on a 3D printer, using PLA plastic. (I actually use Technology Outlet PLA-Plus) There are quite a few components that need to be printed and assembled. It takes quite a long time to print them all, this cannot be printed in a single weekend unless you have a very impressive printer farm.
The mechanical parts, bearings, bolts, gears, shafts etc are all budget items sourced online. They are not free, but can be purchased a little at a time without breaking the bank. A slow 3D printer is your budgeting friend here J
How does Pi-lomar operate?
The python routine is simple in concept, it only looks complicated and messy because I wrote it. I learned very quickly that the combination of Raspberry Pi, Linux and Python gives access to an enormous library of pre-existing software solutions. Generally when you are writing in Python you are just combining other people’s generous hard work in a new way.
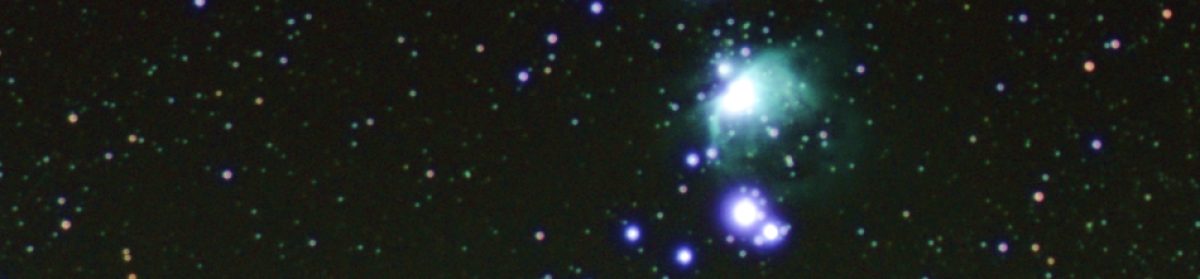
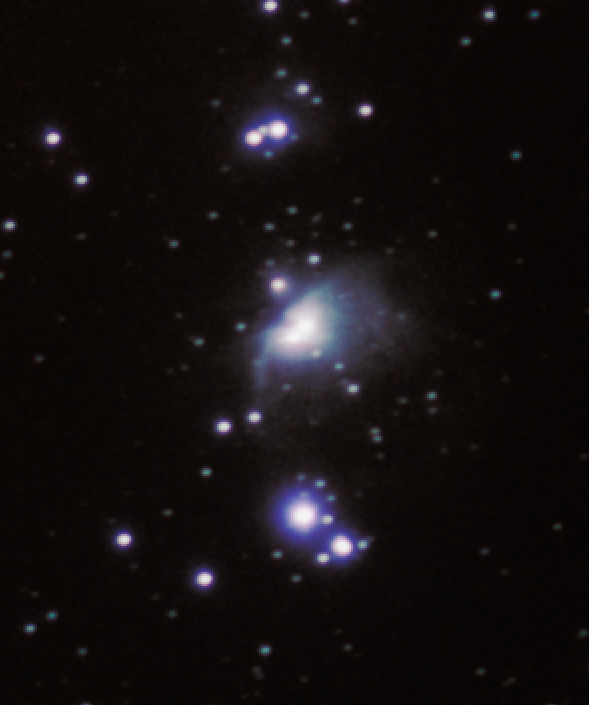
At the high level, the program asks for a target (a planet, a star or a nebula), then it points the camera at the object and takes a photo. It keeps moving the camera to follow the target, and keeps taking photos until it drops below the horizon or you have enough photographs.
The night sky is quite dark, so you need to take a slow photograph to capture most things. Just a few seconds exposure with default settings will show you something, maybe some of the brighter stars and planets, maybe even the faint smudge of a galaxy or nebula. But if you take LOTS of photographs the right way you can use some other magical software that combines all those photographs to produce a single higher quality and more detailed image. I have not worked out how to get the Raspberry Pi to do this ‘stacking’ yet, but it can gather and prepare the photos so that they can be stacked on another computer. Pi-lomar gathers and prepares photographs so that they can be passed to a regular Windows PC running astrophotography stacking software. I use DeepSkyStacker. There are many alternatives out there.
How does Pi-lomar know where to look?
There is a wonderful astro library called skyfield_py developed by Brandon Rhodes. It performs very useful calculations very efficiently and with an accuracy that I can only dream of. If you want to know where the moon is right now? Ask Skyfield. If you want to know when Mars will rise? Ask Skyfield. If you help it a bit, it can even calculate satellites and comets. It also takes into account the distortion of the atmosphere and that fact the light from the object does not arrive instantaneously, so you look in the right place.
It is trivial to convert the ALTITUDE and AZIMUTH of an object from Skyfield into the position of the two motors.
How does Pi-lomar take the photographs?
For speed and simplicity in development Pi-lomar just uses the ‘raspistill’ command to take a photograph. This is a useful utility, and has a lot of options that let you control how the photograph is captured. It is not the most efficient way to capture the photographs, but WORKING AND SLOW is better than BROKEN BUT FAST. I will eventually speed this up, I am sure.
Normally we save pictures as JPG, PNG or TIFF format images. But these formats all involve a lot of processing of the raw image that the sensor actually captured. Astrophotography stacking software often works wonders with that original RAW sensor data. The stacking software knows how to handle the messy raw information from the camera sensor to pull out details that would otherwise be lost. So raspistill is used to capture this RAW sensor data. It’s a little bit of a messy process, I would love to see this simplified! But by passing the captured images through another routine called PyDNG we can extract the original raw data from the sensor and save that ready for the stacking software.
The ultimate output of the camera is a folder full of .DNG (“digital negative”) files which look awful to us, but are full of information to the stacking software.
The stacking software also requires some ‘control’ photographs to be taken which help it identify noise and faults in the camera sensor. Pi-lomar will also let me take these, and store them along with the actual astro photographs.
Load all those photographs into DeepSkyStacker (or similar) and let it work its magic. After stacking I usually adjust some image settings for clarity, then save it. I can further tweak them in GIMP or some other image package.
How does Pi-lomar know where it is pointing?
It doesn’t! I could have position sensors of some type that would tell physically where the camera is pointing. But this is a low budget project, AND I wanted to keep the complexity low. So Pi-lomar operates by ‘dead reckoning’ It moves the motors based upon where it THINKS it is pointing. It has logic to ‘remember’ what position it has requested, and this works quite well. But sometimes there may be timing or friction problems and the a motor step may be missed. Remember the camera moves 0.015degrees per step so a single mistake is not significant, but it has to make a LOT of steps in order to move any significant distance.
The two major causes of error I have seen are ‘timing’ issues with the control signals, LINUX is NOT perfect for motor control, it can unexpectedly pause to do other tasks outside your control. This might cause poorly formed move signals. There is also some friction in the entire device, the observatory dome is as heavy as the underlying bearing can handle, sometimes it may not move as smoothly as hoped, there is also some ‘slack’ in the gearing, if the platform changes direction it might take a few extra steps to recover motion properly in the new direction. (I’m currently trying to improve the gearing and the control of the motors to make things smoother.)
Sounds awful, can it be solved? Skyfield to the rescue again. Skyfield tells where the target is, but it can also tell where neighbouring stars are. The 16mm lens has quite a wide field of view (about 20degrees), so even quite large position errors probably still see SOME of the expected stars. With help from Skyfield (and OpenCV) I create a simulated image of the sky. The REAL and SIMULATED images can be compared to check for errors. Another fantastic library called astroalign will even do the comparison for you! Given two images astroalign tells how they differ. I convert that difference into ‘tuning’ instructions for the motor. In effect Pi-lomar can roughly auto-correct itself using this astroalign check periodically detect movement errors.
Astroalign will probably be useful again if I manage to take the final image stacking on-board the RPi someday too. The tracking is not fast or 100% accurate, but again the wide field of view allows us some flexibility here, so it’s certainly good enough for this project.
What software components does Pi-lomar use?
This is what I include in my build script at the moment hopefully some can be cleaned out eventually.
- First I thoroughly recommend that you install the full Raspian operating system, including the desktop support and standard applications. Pi-Lomar is designed to run over an SSH connection with a terminal interface at present but I found many dependencies needed adding back in if you try to run Pi-lomar on the more basic ‘headless’ installation.
- Skyfield_pi. (For astronomical calculations.)
- OpenCV (for image generation and processing the captured images.)
- PyDNG (for stripping out the RAW sensor data from the camera.)
- Raspistill (should be already part of the basic operating system installation)
- Python3 (components didn’t play nicely together in the Python2 environment.)
- Numpy 1.16.5 or later (and potentially matplotlib behind the scenes)
- Pandas (Data analysis library)
- Astroalign (calculates alignment differences between images)
- And a whole bunch of other dependencies gradually appeared during development.
- Scikit-image, libwebp-dev, libtiff5, libopenjp2-7-dev, libjasper-dev, libqtgui4, libqt4-test, libhdf5-dev, imutils, libilmbase23, libopenexr-dev, libavcodec-dev, libavformat-dev, libswscale-dev, libv4l-dev, libatlas-base-dev
NOTE: Already by March 2021, the dependency list was different and more complex when I tried to build a 2nd RPi to develop the next version. As all packages develop it is a constant risk that some version conflicts are created. Patience is required here!
- Then on the PC. An astrophotography stacker (DeepSkyStacker or similar) and an image editing program (Gimp or similar). Also a good SFTP tool is handy, there are a LOT of images to transfer if you have a good observation night!
Current challenges
- Friction was originally a worrying issue. The main bearing for Pi-lomar is a budget Lazy-Susan bearing from E-Bay! A high quality industrial bearing of the same size would be at least 10 times the price. I’m using computing power to overcome the limitations at the moment, but I have ideas how to physically improve things in the next version without adding expensive components into the design.
- Accessing the RAW data from the camera sensor is not pretty. I would love to see this improved. If I can find a simpler pipeline I think even some stacking and processing of the images could be handled onboard in realtime. Not sure how yet, but that’s the dream. I’ll probably convert from raspistill to picamera or libcamera eventually.
- Very long exposures. The Hi Quality camera will support exposure times of 200seconds. I’m currently only using much shorter times, 200 seconds requires good tracking precision and separating the motion and camera functionality into separate threads. At time of writing, this is my focus. That might force fundamental changes across the project still…
- Weight! The body is quite heavy, even for a 3D printed item, this increases friction and demands stronger motors and reduces speed! Early versions of Pi-lomar were small and light, they could keep up with an ISS overhead pass, the current versions don’t. A weight loss program is required for future versions. However weight also gives stability, it’s a fine balance!
- Electronics. I need to refine the home-made ‘hat’ for the Raspberry Pi which would simplify the wiring connections within the device. You can survive with breadboard wiring at first, but it’s not very robust in the long term. There are some issues to overcome with signal noise on some of the GPIO pins before they are initialised. These can disturb the motors, so currently there is a very specific startup sequence to follow! I want to resolve this so that it’s simpler ON/OFF. (Currently experimenting with the new Raspberry Pi Pico microcontroller here)
- I would love a deeper understanding of the skyfield_py library. I’m pretty sure that it can do some of the calculations I’ve struggled with, but I’m not confident enough with it.
- The lens is not the same quality that you would get with traditional SLR camera lenses. The sensor will take larger lenses, but they will add to the weight and may require a redesign of the gearbox too. However it’s clear that the design would adapt to take other lenses of higher quality and power. The 16mm lens is also difficult to get perfectly crisp. In daylight you can get a fine focus on images, but for astro photographs it’s very fiddly to get it REALLY crisp. I am experimenting with a small 3D printed Bahtinov Mask to see if that will help with this. It’s possible that the motors may generate some vibration too, but I’m not sure yet. If I stick to the original concept of ‘cheap astronomy’ then fitting larger lenses is not in the spirit of the project at the moment.
- Axis alignment. For very long exposure photographs the structure needs to be converted to a ‘Polar aligned’ mount. This will reduce the rotation of images as the sky passes overhead and allow more precise alignment of them as they are combined. It will also simplify the motor control for tracking, but introduce a new challenge to keep the dome opening aligned. The principle is simple, but I have to redesign quite a bit of the structure and rethink the drive system. That may be 2 versions further ahead J
- Weatherproofing. The dome provides quite good protection from dew forming on cold nights, there is some heat given off by a RPi 4 and the stepper motors. It seems to keep the interior of Pi-Lomar above the dewpoint. But it is definitely NOT weatherproof. Ultimately I would like to design a properly weatherproof housing that will allow the telescope to be mounted outside permanently. Then I can combine it with the aurora alarm I made years ago and automatically photograph the aurora too if it ever appears here.
Next steps
Pi-lomar is ‘just’ freshly working. I’m only now satisfied that something useful is achievable. I have quite a lot of finetuning and experimentation to do. I need to find the limits of quality and precision still. As a result the current software is full of ‘debugging’, ‘logging’ and ‘experiments’. I am still discovering new Python features and libraries to improve or simplify the solution. As every programmer says every day… “this needs a complete rewrite” – – must….. resist……
I suspect that there is at least one more design of the body to go through, which will have the polar aligned mount, reduced weight, reduced friction and better motor control, that may take some time to finalise and has to wait until ‘observing season’ is out of the way.
It would be very easy to increase complexity and cost in order to improve quality further. Costly motor controllers, expensive bearings, more processing power…. But they are not the target. The idea is ‘cheap astronomy’. I want to take interesting photographs, not design the perfect telescope in THIS project.
Where are the designs published?
I’ve not published them yet, I’m currently checking the limitations and reliability, and ensuring that it can photograph enough items to be useful. I’m hoping to refine a new Pi-Lomar body based upon those lessons, then I’ll publish a cleaned up example program and the STL files for the 3D printing. Then smarter people than me can improve it further! That means learning how to use something like GitHub too I suppose J
I cannot wait. How do I start anyway?
I bet you could build something out of cardboard if you are in a hurry! You don’t need anything clever to get started. The key to everything is learning how skyfield_py library works on a RPi. You can achieve a lot if you can just point a camera at something in the sky and take a photograph with raspistill! Everything else, including connecting to the stepper motors is described online.
Lessons learned
- If you find yourself writing complicated tasks in Python. STOP! Spend a couple of days searching and you will usually find a far superior solution already exists as a library that you can import.
- Script everything. You WILL make mistakes, want to start again, if you are really lucky you’ll probably even blow stuff up sometimes. A complicated project is impossible to remember in detail, so make sure that you can BUILD your solution from scratch in scripts. Maybe even build it into the program itself, every time you run it, the program first checks that everything’s OK. Folders exist, access rights work, modules are installed (Python will do that last bit spectacularly anyway! J)
Be prepared that even your carefully constructed build script will break anyway, dependencies change as packages update. - If you REALLY cannot find the fault in your software, check the hardware! I recently lost a few days trying to debug comms problems, only to ultimately find that there was a faulty board.
- Don’t care about performance at first. Care about functionality. If the functionality is right, performance can be chased afterwards. If your idea doesn’t work at all, its better to find out early. When combining lots of libraries, there are many combinations that ‘eventually’ don’t work. You may get a long way into a solution before hitting a problem. It is horrible when it happens, but it DOES happen so have the energy to try a new path instead! Your software will NEVER be perfect, aim instead for WORKING!
- DO IT BADLY